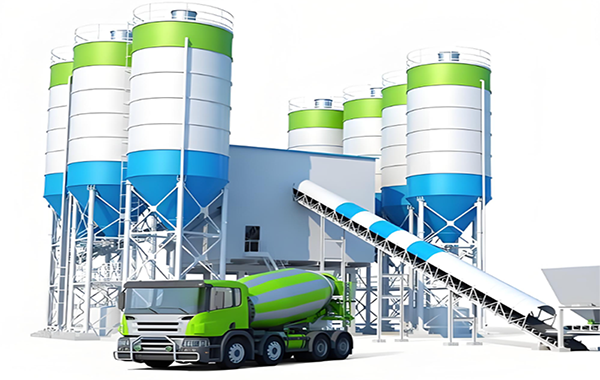
1、 Transportation of concrete batching plant upon arrival
The various components of the concrete mixing plant are connected by bolts, assembled in the factory, and disassembled into individual assemblies and parts after passing product inspection, and then transported to the construction site.
2、 Installation of concrete batching plant
(1) Preparation before installation:
1. Site preparation: Leave enough installation space according to the size of the foundation. 2. Lifting and transportation equipment: one crane and one loader weighing over 20 tons each;
3. Welding machine: 1 unit; 4. Gas cutting and welding tools: 2 sets; 5. Other auxiliary facilities: ① Several lifting steel ropes ② Eight sets of wrench (opening, plum blossom)
6. On site installation personnel configuration: ① Installation technician: 1 person ② Installation auxiliary personnel: 6 persons ③ Material transfer personnel: 2 persons ④ Auxiliary personnel: 2 persons
(2) Attention:
① Under the premise of allowable lifting capacity, try to expand the ground assembly components as much as possible for lifting together;
② Before installation, each component needs to be counted and numbered. During lifting, a dedicated person should be responsible for directing to prevent rework due to lifting errors and ensure safe lifting;
③ During installation, the installation dimensions should be checked at all times and deviations should be corrected in a timely manner;
④ After installation, if the surface paint is damaged, it should be repainted.
⑤ All installation personnel are required to wear safety helmets and seat belts.
⑥ Non installation personnel are not allowed to enter the construction site.
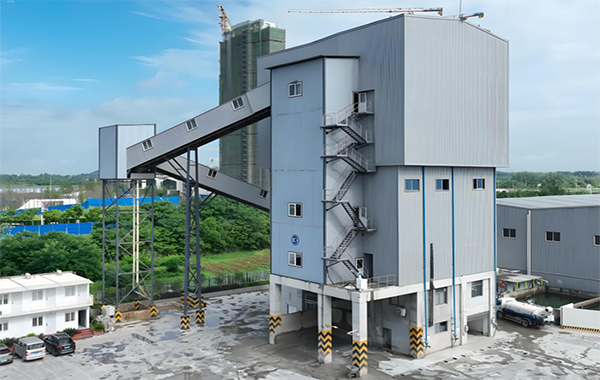
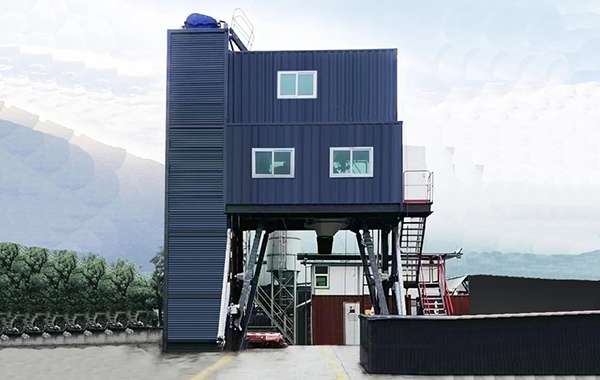
(3) Installation of concrete batching plant equipment:
To ensure installation progress and reduce installation workload, a crane and loader are used simultaneously during installation to improve efficiency. Check if the foundation meets the installation requirements, and if so, proceed with installation.
The installation sequence is as follows:
1. Installation of host rack
(1) Connect the mixing layer beam with bolts and connecting plates, use an 8t crane to lift the mixing layer beam, and then rotate it 180 ° so that the lower plane of the mixing layer beam faces upwards. Lift the lower support legs separately with an 8t crane, connect them to the mixing layer beam with bolts, and connect the mixing layer beam to the four columns on the ground. Lift the hopper under the mixing layer beam and connect it with bolts, then rotate it 180 ° so that the columns face downwards. Use the crane to lift it onto the foundation and fix it with anchor bolts.
(2) Lift the mixing machine onto the main beam and connect it with bolts.
(3) Lift the weighing layer, connect the weighing layer with bolts, and connect the weighing layer and the mixing layer on the ground. Then rotate 180 ° so that the column faces downwards, and use a large crane to lift and fix it on the mixing layer beam.
(4) Connect the door platform and mixing layer ladder with bolts; Afterwards, connect the accessories such as the water discharge pump, water discharge pipe, and powder pipe of the mixing layer with bolts.
(5) Lift the temporary storage compartment with the door opening device installed to the measuring compartment and connect it with bolts.
(6) Lift the pressure relief pipe into place and connect it with bolts.
(7) Lift the powder measuring system and liquid measuring system into place and connect them properly, ensuring that each measuring hopper is in a free state without interfering with other components.
(8) Lift the dust collector in place and install it as required.
2. Belt conveyor installation
There are two types of inclined belt conveyors, one is a high-end edge groove belt conveyor, and the other is a circular Niuliang belt conveyor. The installation methods of the two conveyors are introduced below:
Due to the long length of the inclined belt conveyor, the frame is prone to deformation, the installation height at the top is high, and the crane arm is too long, which can easily lead to safety accidents. Therefore, it is necessary to pay attention to the lifting method and position.
(1) Installation of high gear edge groove belt conveyor
① Connect the frames of each section of the belt conveyor together with bolts; Integrate the inclined platform with the middle bracket, set up the middle bracket, install the belt, install the upper and lower roller sets, and install the support legs
② Lift it into place with two cranes, calibrate it, and connect the anchor bolts.
③ Adjust the tensioning device to ensure moderate tension of the belt.
④ Install belt tapping device.
⑤ Install the empty section cleaner.
⑥ After normal operation, install the guide chute, aggregate cylinder, tile edge plate support, and tile edge plate.
(2) Installation of circular flat belt conveyor
① Connect the frames of each section of the belt conveyor together with bolts.
② Connect the inclined platform with the conveyor frame as a whole, use two cranes to lift it into place, install the support feet, calibrate and connect the anchor bolts.
③ Install the walkway guardrail properly.
④ Lift the aggregate drum into place and connect the bolts.
⑤ Install the upper and lower roller groups.
⑥ Install the belt.
⑦ Install the driving drum, driven drum, and steering drum.
⑧ Install the heavy hammer tensioning device.
⑨ Install tile edge plate support and tile edge plate.
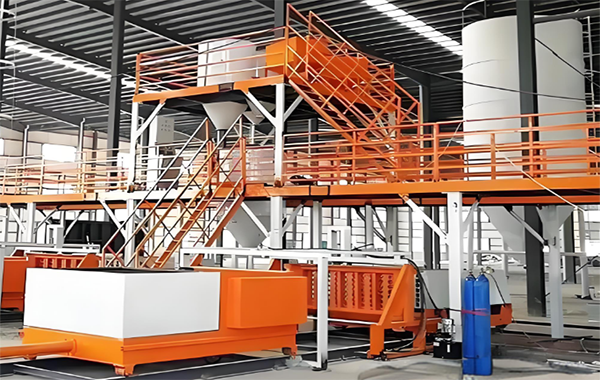
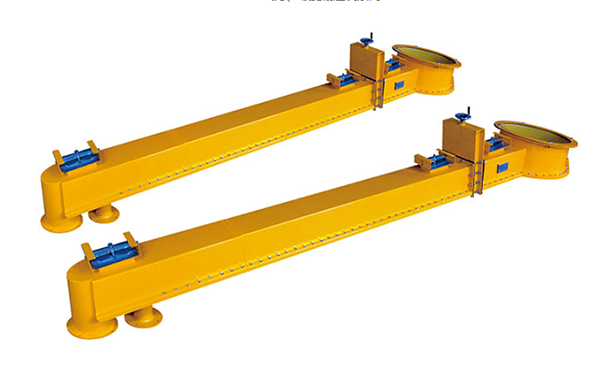
3. Installation of aggregate batching system
(1) Lift the ingredient system in transportation status onto the already laid foundation and secure it with anchor bolts.
(2) Lift the upper compartment into place and fix it on the rack.
(3) Install the sensor and adjust the distance between the upper surface of the measuring bucket and the discharge door to an appropriate level. It is strictly prohibited to subject the sensor to torque when installing it. For the underground batching machine, the transport hinge should be loosened, but not removed, so that it is no longer under force.
4. Installation in the operating room
(1) After connecting the operating room to the bracket, lift it onto the already laid foundation and fix it with anchor bolts.
(2) Install the down ladder and up ladder.
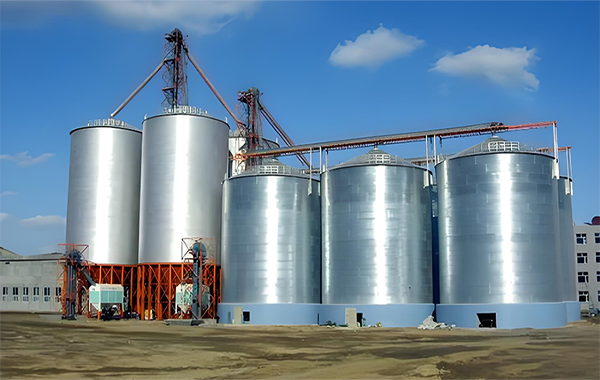
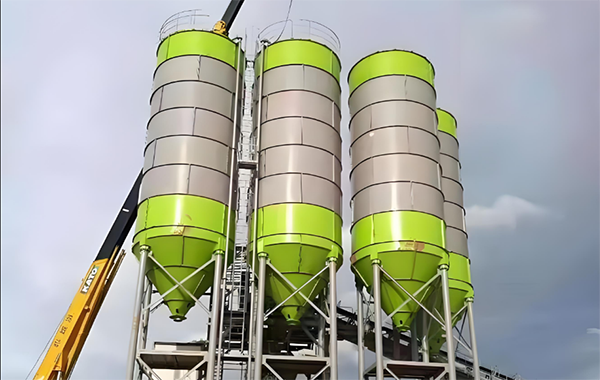
5. Installation of cement silo and screw conveyor
(1) Assemble each component of the supporting cement silo on the ground one by one (installing the upper and lower level gauges and their circuits, dust collector cables, ladders and railings, air breakers, solenoid valves and air filters, cement feeding pipes, screw conveyor ropes, etc.), then lift the cement silo and place it in place, and tighten the anchor bolts. (Note: For areas where wind speeds often exceed level 6, wind ropes should be added.).
(2) Assemble the screw conveyor on the ground, hang the feeding end on the discharge port of the cement silo, align the discharge port with the feeding port of the measuring hopper, tighten the lifting rope, install the screw conveyor bracket, and then connect the feeding port to the discharge port of the cement silo. Connect the discharge port to the feeding port of the measuring hopper with a soft rubber sleeve. Be careful not to tighten the soft rubber sleeve too tightly to avoid affecting the measurement accuracy.
(4) Pipeline installation
Waterway installation: Position the water pump and install the water supply pipe as required. Users can build their own water tank with a capacity of no less than 10m ³, or directly connect the water pump to the tap water pipeline,
1. The flow rate of the pipeline should not be less than 50m ³/h.
2. Additives: Place the additive storage bin in place and install the additive pipeline.
5. Installation of pneumatic system
1. Fix the air compressor and air storage tank in place.
2. Connect the pipelines between the air compressor, air storage tank, various air control boxes, cylinders, etc. according to the diagram.
6. Exterior Decoration Installation
1. Place each bent piece on the large fruit of the olive fan and the fire fruit of the weighing layer, and pack them with good intentions.
2. Install the doors and windows properly.
3. Install the axial flow fan.
7. Electrical system installation
1. The mixing and metering system control electrical appliances are installed in the main electrical cabinet and control console respectively. Before external wiring, check whether each part of the electrical components is intact, whether they are firmly fixed, whether the wiring screws are loose, and whether the welding joints are detached or corroded.
2. Connect the wires between the electrical cabinet, control panel, as well as the motors, solenoid valves, travel switches, sensors, etc., and recheck them according to the electrical schematic diagram. The system adopts grounding protection as a safety protection, and requires good grounding protection measures at the installation site. The protective wire of the motor cable, the shell of the electrical box, the main grounding bolt of the equipment, and the main grounding J are electrically connected, and the protective wire is not allowed to be connected in series. If the external power supply allows zero protection, the protective wire PE is connected to the protective wire of the motor cable, the shell of the electrical box, and the main grounding bolt of the equipment; The main grounding terminal of the equipment, the grounding terminal of the cement silo, and the grounding terminal on the support leg of the main control room can be connected to the main grounding wire using exposed conductors such as wires or flat steel that meet the corresponding grounding requirements. Users can install them themselves. After the equipment installation is completed, the installation personnel should check that the pure resistance is not greater than 4 ohms and that the equipment is grounded at the same potential. If it does not meet the requirements, it should be rectified immediately by entering the pole.
2. The layout of external building lines should be reasonable, beautiful, and generous. Power lines and signal lines should not be laid parallel, and the wiring arrangement of each part should be neat, without contact with oil, water, or corrosive substances. All power supply and distribution for the concrete mixing plant shall comply with the relevant provisions of GB5226.1-1996 and factory power design technology; Products with requirements should comply with the regulations of the industry or department.
8. Lightning protection device
According to the natural conditions such as geography, geology, soil, meteorology, and environment of the equipment usage site, as well as the laws of lightning activity, the user shall install lightning protection devices themselves in accordance with the "GB50057-1994 Code for Design of Lightning Protection of Buildings" and other requirements.
9.Safety assurance measures
1. All installation personnel must wear safety helmets before conducting on-site operations.
2. On site personnel and machinery must obey the deployment and command of the commanding personnel.
3. During the lifting process, the crane should move steadily and obey the command of the ground command personnel. The lifting operation of the crane should be commanded by a dedicated person and not operated illegally.
4. When lifting, it should be firmly fixed to prevent detachment. During the lifting process, personnel are not allowed to work under the lifted object.
5. Lifting is prohibited in adverse weather conditions. Safety protection ropes must be installed during high-altitude operations, and hands should be firmly grasped when climbing. If the cement silo is higher than other surrounding buildings, lightning rods should be installed.
6. The installation of cement tanks must ensure their verticality.
7. After installation, the electric bell should be pressed three times with a 10 second interval before starting the mixer and belt conveyor. The device can only be started after 5 seconds have passed since the third electric bell.t
8. It is strictly prohibited to enter the interior of the mixer without reason. If it is necessary for maintenance, the power should be disconneced, a warning sign should be hung stating "No Switching on while working", and a dedicated person should be assigned to guard it to prevent accidental switching on. After confirming that there is no one inside the mixing tank, the mixer can be started to prevent accidents or injuries.
9. It is strictly prohibited for personnel to put their hands into the screw conveyor. If necessary, the power should be disconnected and a warning sign should be hung stating "No closing while working" to prevent accidental closing. After ensuring safety and correctness, the screw conveyor can be started.